How to Share OneDrive Files and Folders

Share OneDrive Files and Folders

  1. Go to the OneDrive website and sign in with your work or school account.

  2. Select the file or folder you want to share, and then select Share.

    Screenshot of sharing dialog box showing a sharing link for people inside the organization.

  3. Enter the names of the people or groups you want to share the file or folder with. You also have the option to add a message.

    Optional: Click the dropdown list to change the type of link. The Details pane opens, where you can change who can access the link and whether people can edit the item you’re sharing.

    Options for Who would you like this link to work for (options vary based on admin settings):

    • Anyone gives access to anyone who receives this link, whether they receive it directly from you or forwarded from someone else. This may include people outside of your organization.

    • People in <Your Organization> gives everyone in your organization access to the link, whether they receive it directly from you or forwarded from someone else.

    • People with existing access can be used by people who already have access to the document or folder. It does not change the permissions on the item. Use this if you just want to send a link to somebody who already has access. 

    • Specific people gives access only to the people you specify, although other people may already have access. If people forward the sharing invitation, only people who already have access to the item will be able to use the link.

    By default, Allow editing is turned on. If you want people to only view your files, uncheck the check box.

    When you're done, click Apply.

  4. When you’re ready to send the link, click Send.

Get a link to a file or folder that you can copy

Another way to share is to get a link to a file or folder that you can copy and paste in a text message or on a website. People you share these links with can also forward your link to others.

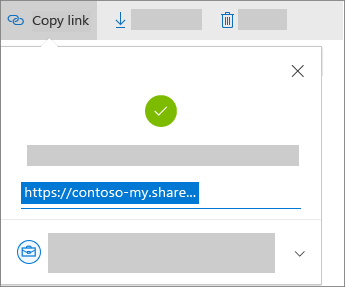
  1. In your OneDrive, click Copy link. The link is automatically copied to your clipboard.

    Screenshot of the copy link dialog box

    Optional: Click the dropdown list to change the type of link. The Details pane opens, where you can change who can access the link and whether people can edit the item you’re sharing.

    Options for Who would you like this link to work for (options vary based on admin settings):

    • Anyone gives access to anyone who receives this link, whether they receive it directly from you or forwarded from someone else. This may include people outside of your organization.

    • People in <Your Organization> gives everyone in your organization access to the link, whether they receive it directly from you or forwarded from someone else.

    • People with existing access can be used by people who already have access to the document or folder. It does not change the permissions on the item. Use this if you just want to send a link to somebody who already has access. 

    • Specific people gives access only to the people you specify, although other people may already have access. If people forward the sharing invitation, only people who already have access to the item will be able to use the link.

    By default, Allow editing is turned on. If you want people to only view your files, uncheck the check box.

    When you're done, click Apply.

  2. Paste the link (Ctrl+V) to wherever you want, such as a text message or on a website.

Notes: 

  • The permission granted by a sharing link lasts only as long as the link exists. For example, when a link is disabled, access is revoked (though people may still have access to the file via other means).

  • When Allow editing is selected: After they sign in, people in your organization can edit, copy, or download the files. When Allow editing isn’t selected, people in your organization can view the file but cannot make changes. However, they can still copy or download the files.

  • You may be able to share files with external users (people not on your network) by inviting them as "Guests," or by creating and posting guest links. These links are available by default in Office 365, but administrators can disable external sharing for your sites. For details, see Share SharePoint files or folders.

Details

Article ID: 74973
Created
Wed 4/3/19 3:48 PM
Modified
Tue 1/30/24 9:21 AM